Minecraft allows players to do a lot of different things, one of the main ones being the fact that the game allows you to build pretty much anything that you want to. However, there’s also the option to create your own servers and do a lot of other things in the game which can make your experience so much more fun and entertaining than it already is. However, players sometimes have to jump through a few heaps in order to access these perks and might even encounter a problem every now and then. We’re going to be discussing one of these problems today.
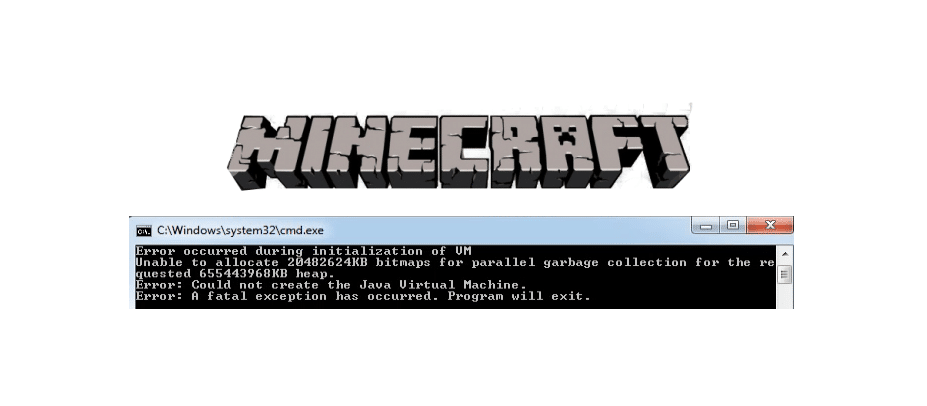
Minecraft: Error Occurred During Initialization of VM
One of the most common errors that occur when players try to start Minecraft or set up a server is the ‘’Error Occurred During initialization of VM Minecraft’’. This is actually one of the most common that Minecraft players face, especially those that are trying the game out for the first time on their PC. However, it isn’t a repetitive problem that keeps occurring and can be fixed with relative ease. Just try any of the solutions we’ve given below and you’ll be able to get rid of this issue as soon as possible.
- Reinstall Java
The first fix to this problem is one of the most simple and arguably the most effective one as well. All it requires you to do is completely uninstall Java from your device and then reinstall it. The only difference is that you have to install the right version for your computer this time. You’ll need to figure out which version you have to download for yourself. For example, you’ll need to choose between Java 32-bit and Java 64-bit depending upon your version of Windows.
Even when it comes to Windows 10 there are two main different variants to choose from. One of these is the 32-bit variant while the other is the 64-bit variant. Just make sure that you install the variant of java that matches the version of Windows that you have installed. Once you do this, you shouldn’t be facing this problem anymore. It usually doesn’t matter which variant you have as long as it’s the right one, since there isn’t a huge difference between their performance capabilities. However, most people still recommend 64-bit programs over their 32-bit counterpart with good reason.
- Allocate More (or Less) RAM
Allocating the right amount of RAM is absolutely necessary regardless of the game you’re playing and allocating too little won’t allow you to play the game properly. If you have the right version of Java already installed, it’s almost certain that the problem lies with the amount of RAM that you’ve allocated to Minecraft. Fortunately, this is another easy to implement a solution that you can perform by simply following the steps we’ve given right below.
The first thing that you’ll have to do is open the Minecraft launcher (Java version) and go into the installations tab which you’ll find on the upper part of your screen. Now find the desired version of Minecraft that you wish to change the settings of and hover over it. You’ll now have to click on the icon with three dots on it after you’ve done so. Now select the option which says edit out of the few that appear and you’ll be able to select another option which says ‘’ more options’’ which should be on the bottom left side of your screen. Once you click on this, there should be a JVM arguments field which you can access and edit. Access this field and change the current –Xmx1G which is probably allocated to –Xmx#G. The # represents any amount of RAM which you wish to allocate to the game.
However, make sure that you don’t go overboard while performing these steps and dedicate more RAM than you have to the game. Dedicating more RAM than you have is another common reason for facing this issue and you should ensure that you only allocate an amount which your computer can safely handle. Otherwise, you’re bound to face a few issues here and there. These two are pretty much the only solutions that you’ll need to get rid of this issue, so try them both out and get back to playing Minecraft in no time!