🎮 Satisfactory Overclock Power Calculator
Calculate Satisfactory machine power draw, clock speed, output scaling, shard limits, underclock savings, and 100% machine equivalents with the official nonlinear exponent.
| Clock speed | Output multiplier | Power multiplier | Constructor or Smelter MW | Assembler MW | Shard requirement |
|---|---|---|---|---|---|
| 10% | 0.10x | 0.0476x | 0.19 MW active, 0.1 MW idle floor note | 0.71 MW | 0 shards |
| 25% | 0.25x | 0.1600x | 0.64 MW | 2.4 MW | 0 shards |
| 50% | 0.50x | 0.4000x | 1.6 MW | 6 MW | 0 shards |
| 75% | 0.75x | 0.6830x | 2.73 MW | 10.25 MW | 0 shards |
| 100% | 1.00x | 1.0000x | 4 MW | 15 MW | 0 shards |
| 150% | 1.50x | 1.7099x | 6.84 MW | 25.65 MW | 1 shard |
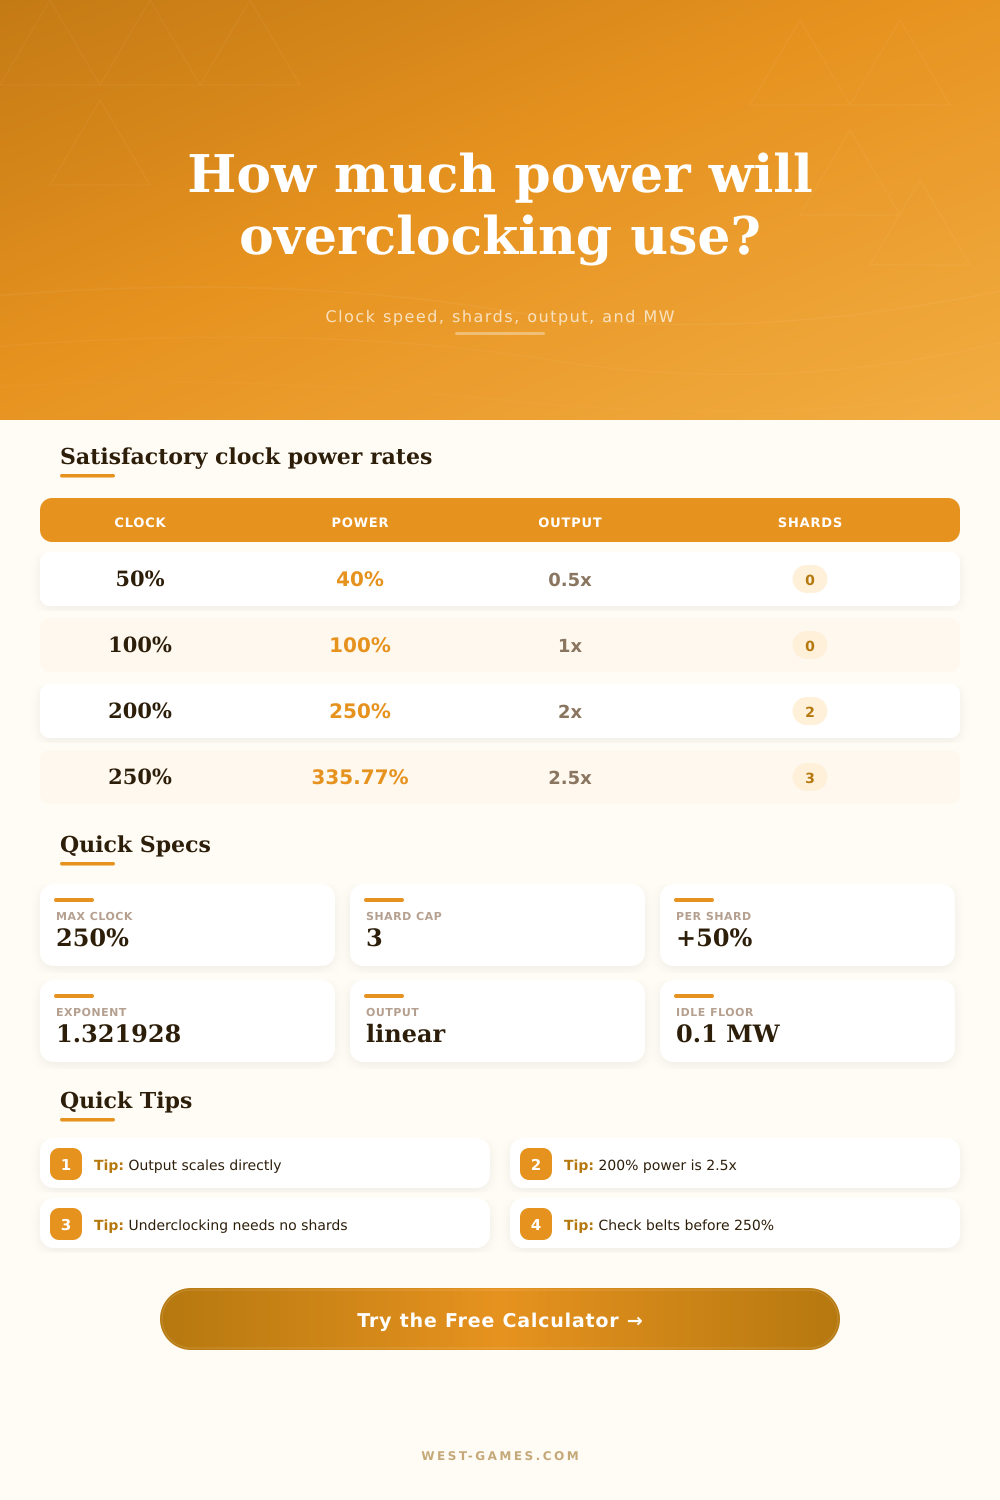
| 200% | 2.00x | 2.5000x | 10 MW | 37.5 MW | 2 shards |
| 250% | 2.50x | 3.3577x | 13.43 MW | 50.37 MW | 3 shards |
Power multiplier uses (clock / 100)^1.321928. Output multiplier uses clock / 100. Values are rounded for display.
| Machine | Base MW at 100% | Default base output | Output unit | Common planning use | Overclock note |
|---|---|---|---|---|---|
| Constructor | 4 MW | 30/min | items/min | Single-ingredient parts and concrete planning | Uses normal production exponent |
| Smelter | 4 MW | 30/min | ingots/min | Iron, copper, and caterium ingot lines | 250% draw is 13.43 MW |
| Assembler | 15 MW | 5/min | parts/min | Frames, rotors, reinforced plates | 200% draw is 37.5 MW |
| Foundry | 16 MW | 45/min | ingots/min | Steel and alloy ingot recipes | Use recipe rate as base output |
| Manufacturer | 55 MW | 2.5/min | parts/min | Heavy modular frames and computers | 250% draw is 184.67 MW |
| Refinery | 30 MW | 30/min | items/min | Oil products and pure ingot recipes | Fluid or item output scales linearly |
| Blender | 75 MW | 40/min | m3/min | Diluted fuel and late-game fluids | 250% draw is 251.83 MW |
| Miner Mk.1 | 5 MW | 60/min | ore/min | Normal node baseline extraction | Node purity can be entered as multiplier |
| Miner Mk.2 | 12 MW | 120/min | ore/min | Mid-game ore extraction | Belt limit can cap useful output |
| Miner Mk.3 | 45 MW | 240/min | ore/min | Late-game ore extraction | Pure-node 250% may exceed belt capacity |
Recipe and node rates vary. The base output field is editable so the calculator can match the specific recipe or resource node selected in-game.
| Shards installed | Maximum clock | Output ceiling | Power ceiling | Underclocking rule | Use case |
|---|---|---|---|---|---|
| 0 | 100% | 1x base output | 1x base MW | Any clock below 100% needs no shard | Ratio syncing and power saving |
| 1 | 150% | 1.5x base output | 1.7099x base MW | Underclock still free | Small output bump without maxing shards |
| 2 | 200% | 2x base output | 2.5x base MW | Underclock still free | One machine replacing two at higher MW |
| 3 | 250% | 2.5x base output | 3.3577x base MW | Underclock still free | Compact builds and scarce node extraction |
The cap check is optional in the form. Turn it off only when you want to explore a target rate before deciding how many machines to add.
| Goal | 100% machine plan | Overclock plan | Power effect | Space effect | Calculator signal |
|---|---|---|---|---|---|
| Double a Constructor line | 2 Constructors, 8 MW | 1 Constructor at 200%, 10 MW | 25% more MW per output | Half the machines | Efficiency card rises to 125% |
| Run half a recipe rate | Use 1 machine at 100% and buffer | 1 machine at 50%, 1.6 MW if base is 4 MW | Less than half base power | Same footprint, smoother rate | Power saving appears in breakdown |
| Exploit a pure ore node | More miners are impossible on one node | Overclock the miner if belts support output | Higher MW per ore than 100% extraction | Uses the same node | Shard and output caps matter most |
| Meet an exact recipe input | Add machines and split belts | Target mode sets exact clock percent | Depends on clock solved | Cleaner manifolds | Target output controls clock field |
| Reduce grid spikes | Many machines at 100% | More machines underclocked below 100% | Usually lower total MW | Uses more space | Compare against 100% equivalent MW |
Overclocking is often a space or resource-node choice, not a power-saving choice. Underclocking can save power while matching exact recipe ratios.
In another scenario, you have an efficient line but no room or resources for it. You want to expand so you gets a new machine. That means buying more floor space, power cabling, and conveyor belt.
At this point overclocking become a necessary move. It lets you produce like 2 machines while taking up only as much space as one. However, there’s a huge price tag on that.
The Cost of Overclocking
Electricity doesn’t increase at the same rate than production. Many players don’t realize this until they see their power grid go down.
What’s the math of that penalty? Clock speed directly affects how many item you produce, but power draw grows faster because it follows an exponent of about 1.32. That means when you double your speed to 200 percent, power consumption won’t double; instead, it’ll rise by a factor of 2.5. So you’re gaining space efficiency at the expense of energy efficiency.
The page has a calculator that does math for you. Simply select which kind of machine you have and what speed you want to run it at. The calculator will do the math for you, so you don’t have to do any math in your head while managing several production line.
More than that, there’s the question of managing your hardware needs. It doesn’t work like “set the clock speed to 250 percent.” To enable higher performance level, you’ll need Power Shards. One Power Shard increases speed limits by 50 percentage points. Two will get you up to 200 percent. All three will get you up to 250 percent.
This establishes another kind of bottleneck: a lack of resources. Maybe you’ve got plenty of juice for a high-speed smelter. Maybe you don’t have enough mined copper to make the needed shards. In that situation, the machine remains at standard speed.
This means you’ll be planning your resource gathering based off your processing upgrades.
There is an advantage to running your machines slower than they are normaly set. You do not need shards to underclock them. It saves power and it keeps all ratios perfectly synchronized.
If you want half the output of a normal recipe, just run the machine at 50%. That’s going to use far fewer resources than running a machine at full speed when it is only half loaded. It makes a heavy power user into a more modest power user.
The tool on page finds the perfect clock speed. You won’t have to guess when trying to balance a complicated assembly line.
These little boosts add up in late game planning. You want to improve power efficiency by 10 percent? That means dozens more generators you don’t have to construct when those factories are churning out thousands of things every minute. Those generators mean maintenance overhead, they’re physical space, they consume fuel resources. The multipliers from this table on the page demonstrate exactly what I’m talking about: how fast it all adds up.
A 250 percent Refinery take more than three times the power it needs to run! Multiplied by ten, well …
In Satisfactory, efficiency is all about getting as much out as possible while spending the least amount of input doing so. Your power supply will only handle so many watts before it starts to fail, which is why overclocking is such a useful feature.
You should of considered this earlier. But how many extra megawatts does that cost? Do they save enough to justify the lost space? That depends.
In some cases, it’s best to go wider instead of building densely because it makes more sense. Efficient machines require knowing exactly how much density costs. A lot of players prioritize speed without accounting for that cost. When you have the numbers laid out plainly before you, the choice becomes obvius.