🔪 DBD MMR Calculator
Estimate hidden Dead by Daylight skill movement from killer kills, survivor exits, hatch or no-result trials, SWF context, streak pressure, and soft cap behavior.
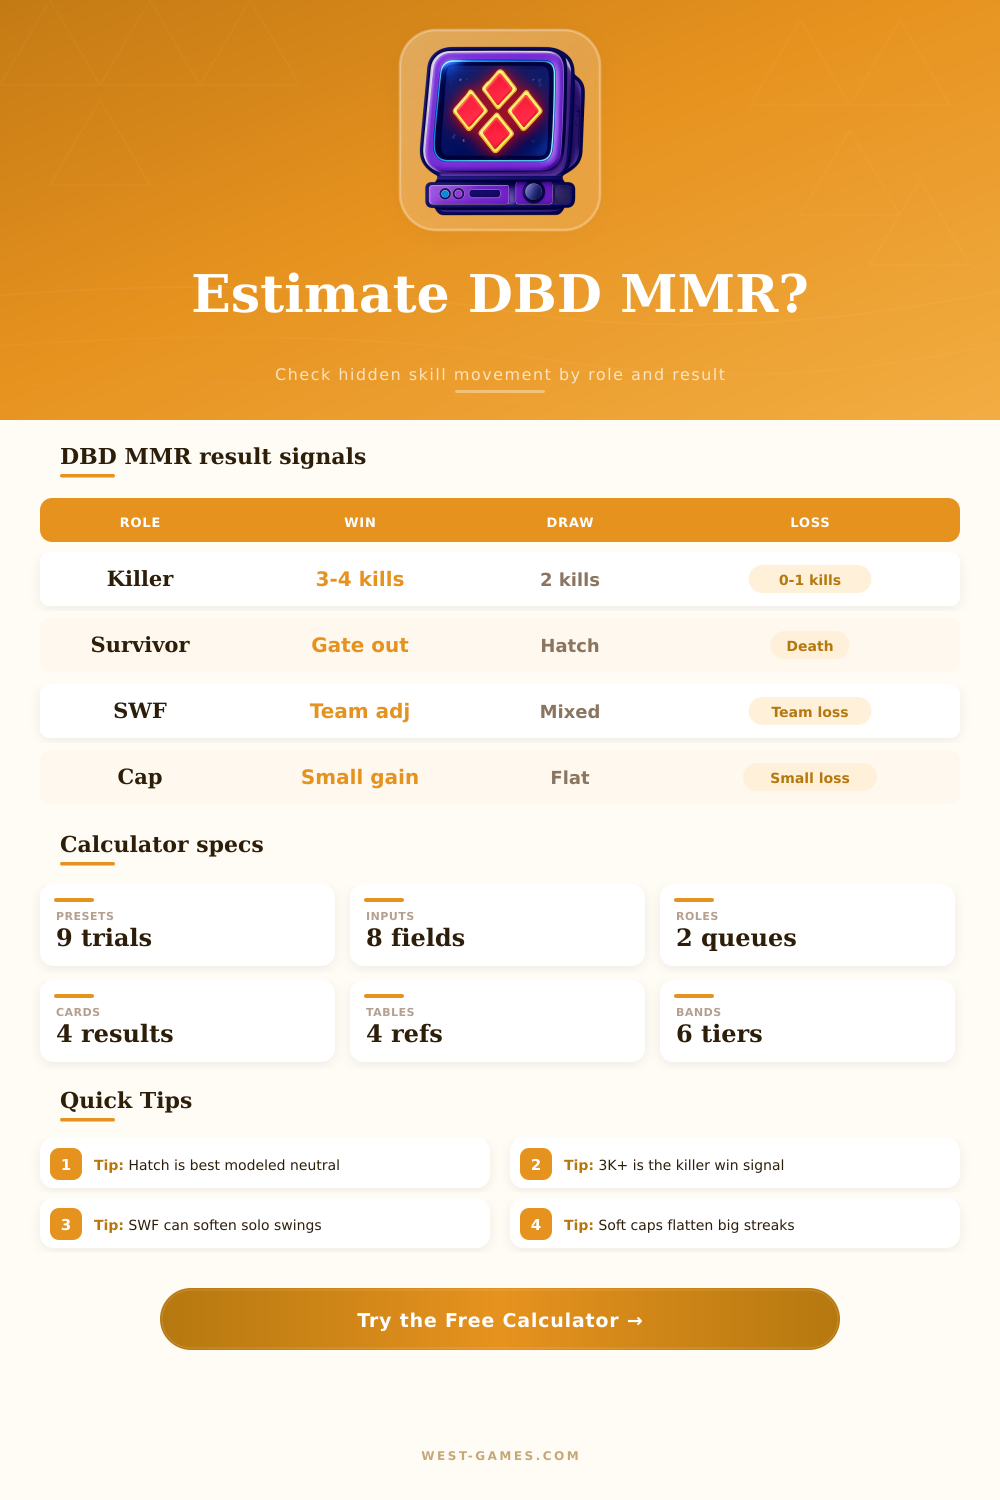
| Role | Positive | Neutral | Negative |
|---|---|---|---|
| Killer | 3K or 4K | 2K or hatch mix | 0K or 1K |
| Survivor | Exit gate escape | Hatch escape | Death or sacrifice |
| No result | None | Ignored | None |
| Backfill | Reduced signal | Uncertain lobby | Reduced signal |
This calculator models MMR direction from visible end states only, not chase score, grade pips, emblems, or Bloodpoints.
| Band | Estimate | Movement | Read |
|---|---|---|---|
| New | 300-899 | High | Sorting fast |
| Low | 900-1199 | Raised | Learning pool |
| Middle | 1200-1599 | Normal | Most stable |
| High | 1600-1899 | Reduced | Strong lobbies |
| Soft cap | 1900+ | Flattened | Hard to climb |
The numbers are an interpretive scale for planning; the live game does not expose the actual hidden value.
| Factor | Lower move | Raise move | Why it matters |
|---|---|---|---|
| Opponent | Weaker lobby | Stronger lobby | Upsets matter more |
| Queue | Fast or backfill | Even search | Match quality varies |
| Party | Four-stack SWF | Solo signal | Team context blurs skill |
| Streak | Soft cap clamp | Early calibration | Recent trend nudges trust |
Party modifiers are confidence and estimate tools, not proof that the live system applies the exact same multiplier.
| Metric | Useful for | MMR model | Calculator use |
|---|---|---|---|
| Bloodpoints | Match activity | Not direct | Ignored |
| Grade pips | Monthly grade | Separate | Ignored |
| Hooks | Killer pressure | Indirect | Context only |
| Chase time | Skill review | Indirect | Context only |
A great chase can still be a visible MMR loss if the survivor dies, which is why results should be read over many trials.
Once you’ve won a round and killed four people, however, it’s going to change your rating within matchmaking system. You’ll think you’re in an easier or tougher round then normal. Why? Because your hidden skill rating adapts based on how well you did.
You never get to see this number. That means the adjustments is confounding, too. It’s not a roll of dice. It’s a math-based change, although one that you don’t have immediate visibility into.
How the Rating System Works
These are all variables that the calculator take into account and spits out an estimate for you. However, it’s important to know what those inputs represent in order for you to believe what comes out. Bloodpoints and visible grade aren’t considered at all. Instead, it’s almost exclusively about if you survive the trial and how your skill match up with the lobby.
Next consider killer perspective. Two kills remain in a neutral zone. While three kills typically signal a win. That’s important because variance plays into your ranking. Consistently getting two kills won’t cause much movement for you. The system view it as stability rather than improvement.
When you input an estimate with four kills the tool will apply a base value. Then it will adjust that based off strength of the lobby. Upsets are statistically significant so beating strong people awards more points. Losing to weak ones isn’t as bad; it will hurt less since the system thinks maybe you just had a bad game.
For Survivor, it’s a bit more complex. Escaping from an exit gate is an obvious plus. Hatches is generally considered neutral. That tends to surprise people, since they view hatch as heroic.
While it can boost your score a little (though usually not by much) in most cases, that only happens if you alter your settings to make it more forgiving. You can flip that assumption on the calculator and check out what happens with a forgiving model.
However, there’s still a wall for most high-level players: Soft caps. When you hit the higher bands of hidden skill, it flatten out a lot in terms of movement per match. That’s because that’s how game was designed. So that new players can’t immediately jump into the top tier. And that’s why the tool assumes this and decreases the multiplier depending on what band you choose (soft cap or high).
Even if you’re performing at an elite level, you’ll see expected movement numbers drop. Streak pressure comes into play as well. If you’re on a long win streak, then maybe you feel more confident. But often the system dampen the gains to maintain stable rating distribution.
Another wrinkle is party size. With solo queue, it’s as pure a signal as possible. You’re representing one player. We know how good (or bad) you are based off your results. When you play with a big group, result will depend on all four players, and there’s much greater variance here. The calculator reduces the multiplier to account for this. It doesn’t trust a data point where someone can win or lose solely because they are coordinated, not mechanically skilled. That’s also why climbing in a duo take longer than when playing solo, despite winning just as many times.
If you review ten trials, then you’ll have a far better idea than if you were just reviewing one. Your trend isn’t a single lucky win from a hatch escape or a chase. Analyze what’s happening in terms of direction over time and look for trends. Are you consistently staying in the same soft cap band and breaking gates? Then your input choices should of show that high-band reality.
Don’t expect to see big jumps per match. Go for consistent small gains against equally matched lobby. It’s about playing in tune with the system. You climb while respecting the rating’s adjustments for your own consistency. Give honest inputs and look at trends over time instead of getting caught up in a single result from a trial.
If you do that, the quiet little number will eventualy catch up to where your actual level of skill lies.