⚔ Genshin Crit Ratio Calculator
Compare Genshin Impact CRIT Rate and CRIT DMG with artifact main stats, artifact substats, weapon bonuses, passive buffs, uptime, 1:2 target balance, overcap handling, and expected damage multiplier.
| Item | Formula | Calculator field | Cap behavior | Meaning |
|---|---|---|---|---|
| Critical hit | Damage x (1 + CRIT DMG) | Effective CRIT DMG | No rate cap needed | Single hit if it crits. |
| Average crit | 1 + clamp(CR, 0%, 100%) x CD | Expected Multiplier | CRIT Rate clamps at 100% | Average over many eligible hits. |
| Crit value | 2 x CRIT Rate + CRIT DMG | Crit value estimate | Raw and effective shown | Artifact shorthand, not full DPS. |
| 1:2 target | CRIT DMG about 2 x CRIT Rate | Target fields | Use effective rate | Efficiency guide before kit needs. |
| Overcap | Raw CRIT Rate - 100% | Overcap handling | Excess rate is zero average gain | Move stats to CRIT DMG or other scaling. |
| Artifact source | Typical value | Use in calculator | Ratio effect | Planning note |
|---|---|---|---|---|
| Five star CRIT Rate circlet | 31.1% CRIT Rate | Circlet main stat | Raises consistency | Often best when raw rate is below 65%. |
| Five star CRIT DMG circlet | 62.2% CRIT DMG | Circlet main stat | Raises crit hit size | Usually better when rate is already stable. |
| Balanced substats | About 24 CR / 48 CD | Artifact profile | Near 1:2 | Good default for non-freeze carries. |
| Rate heavy substats | About 34 CR / 30 CD | Artifact profile | Fixes low rate | Useful before swapping to CRIT DMG circlet. |
| Damage heavy substats | About 14 CR / 86 CD | Artifact profile | Risks low rate | Works with strong rate buffs or freeze kits. |
| Source type | Common crit direction | Input field | Uptime handling | Overcap risk |
|---|---|---|---|---|
| Crit weapon substat | Rate or damage | Weapon secondary or passive | Usually always active | Rate weapons can overcap with buffs. |
| Conditional weapon passive | Rate or damage | Weapon secondary or passive | Use average active value | Check burst windows separately. |
| Cryo Resonance | CRIT Rate | Active buff CRIT Rate | Only on affected or frozen enemies | High in freeze teams. |
| Artifact set trigger | Often CRIT Rate | Active buff CRIT Rate | Set uptime to realistic rotation | Can hide wasted rate. |
| Food or event buff | Rate and damage | Active buff fields | Use 100% while active | Not relevant to Spiral Abyss. |
| Build band | Effective CRIT Rate | Effective CRIT DMG | Expected multiplier | Calculator signal |
|---|---|---|---|---|
| Early artifact set | 40% to 55% | 80% to 120% | 1.32x to 1.66x | Upgrade whichever side is far below 1:2. |
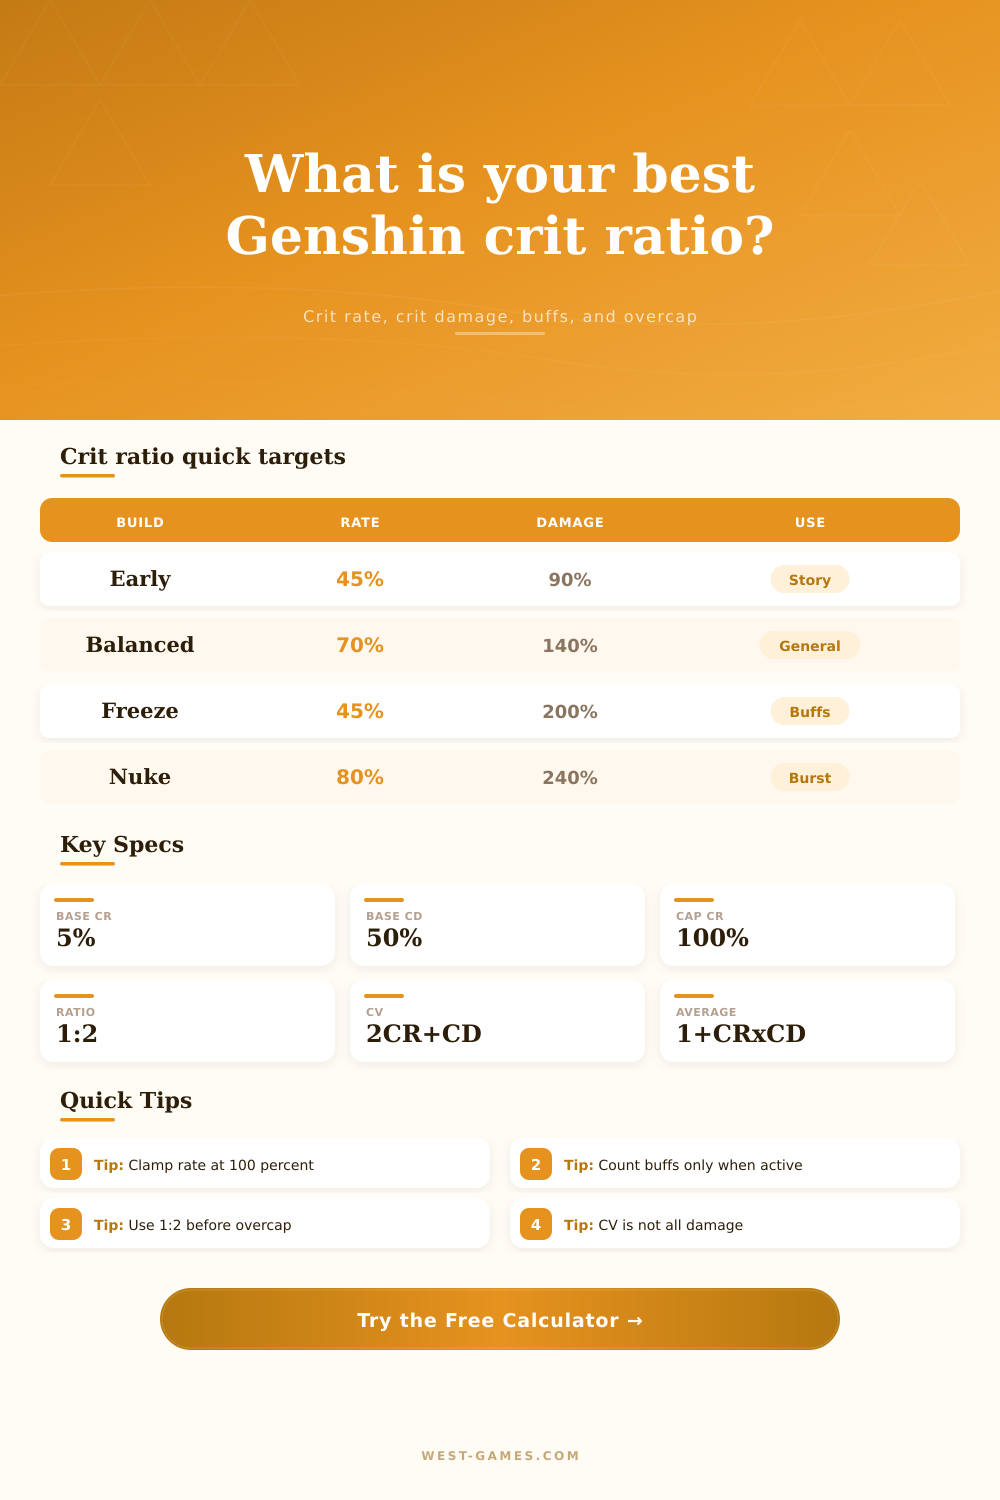
| General DPS | 65% to 80% | 130% to 180% | 1.85x to 2.44x | Most carries feel stable here. |
| Freeze or buffed rate | 35% to 55% raw | 180% to 260% | Buff dependent | Check effective rate after team buffs. |
| Crit weapon build | 70% to 90% | 180% to 240% | 2.26x to 3.16x | Watch for wasted rate above cap. |
| Screenshot nuke | 60% to 100% | 220% to 320% | 2.32x to 4.20x | Average can differ from reset fishing. |
Maybe you have improved your character for hours only to find yourself with a lack of damge output. Generally this is due to a misunderstanding off the critical hit numbers. There are two primary stats: Damage and Rate.
Players tends to seek higher damage values. However, it’s the consistency that delivers that damage. There’s also a rule of thumb from the community: one-to-two. Crit damage should ideally equals your crit rate multiplied by two (or one in some cases). Why? This is because the game treats rate as twice as important than crit damage. That makes sense; if your crit rate is fifty percent, your crit damage should ideally sits at one hundred percent.
How to Balance Crit Rate and Damage
So it’s a handy rule of thumb, but not a hard and fast law. What’s ideal depends on context. So it’s a handy rule of thumb, but not a hard and fast law. What’s ideal depends on context. Team buffs can increases your effective rate so much that it is better to use a lower base rate for a freeze team.
You don’t need to guess whether it’s worthwhile to swap some crit damage for crit rate: the calculator on the page do it for you. This is where a lot of newbies mess up. They think that 62% crit damage on a circlet is always superior to 31% rate. It’s not. On a build with eighty percent crit rate, it is. But on a build with fifty percent rate, it’s probably smarter to add in more rate instead. You want to get to that safe seventy to eighty percent area. Consistency beats theoretical best. Half of your hits don’t hit the crit threshold? You’re better off going for something with a lower number but guaranteed landing.
Don’t cap too high. There’s a maximum cap for crit rate of one-hundred percent. Beyond that it doesn’t matter; the number dont affect your average damage. It can be easy to get caught up in stacking resonance bonuses, weapons, and buffs. Maybe you’re critting at one-twenty percent without buffs, but once you have all of them on, the game still only records one-hundred percent. The other twenty percent are wasted.
Look at the reference table… It lists what an effective stat means compared to its raw total. Make sure to look at your effective rate after applying all buffs so you don’t waste artifact space with non-scaling stats.
There’s another wrinkle: buffs. For example, burst durations is active for only a short time. You have to consider how long they stays active when averaging them across an entire rotation. A buff that provides twenty percent crit rate only for a short window isn’t giving you twenty percent of your total damage; it is giving you a fraction of that. It provides some fraction of it. You can enter those uptimes into the tool, turning what was once a static stat sheet into a dynamic damage projection. That matters when comparing builds that do burst damage during a window compared to ones that sustain steady pressure.
It’s all about the balance: While maxing out crit is important, it isn’t everything. Having 50% crit on your artifact doesn’t automatically make it the optimal choice; it may have no energy recharge, for example, which could of meant your character doesn’t function properly. Think of it less as a multiplier and more as building a whole kit.
Begin by understanding your base stats. Next, add your weapon. Then, factor in your teammates’ buffs and refer to this ratio. After that, you’ll see that the decisions are easier once you grasp that higher damage buys severity while higher rate buys frequency. Stop hunting the biggest number on one item; instead, hunt the biggest average damage per full rotation. THAT’S where the juice is at.