🎮 Rust Raid Cost Calculator
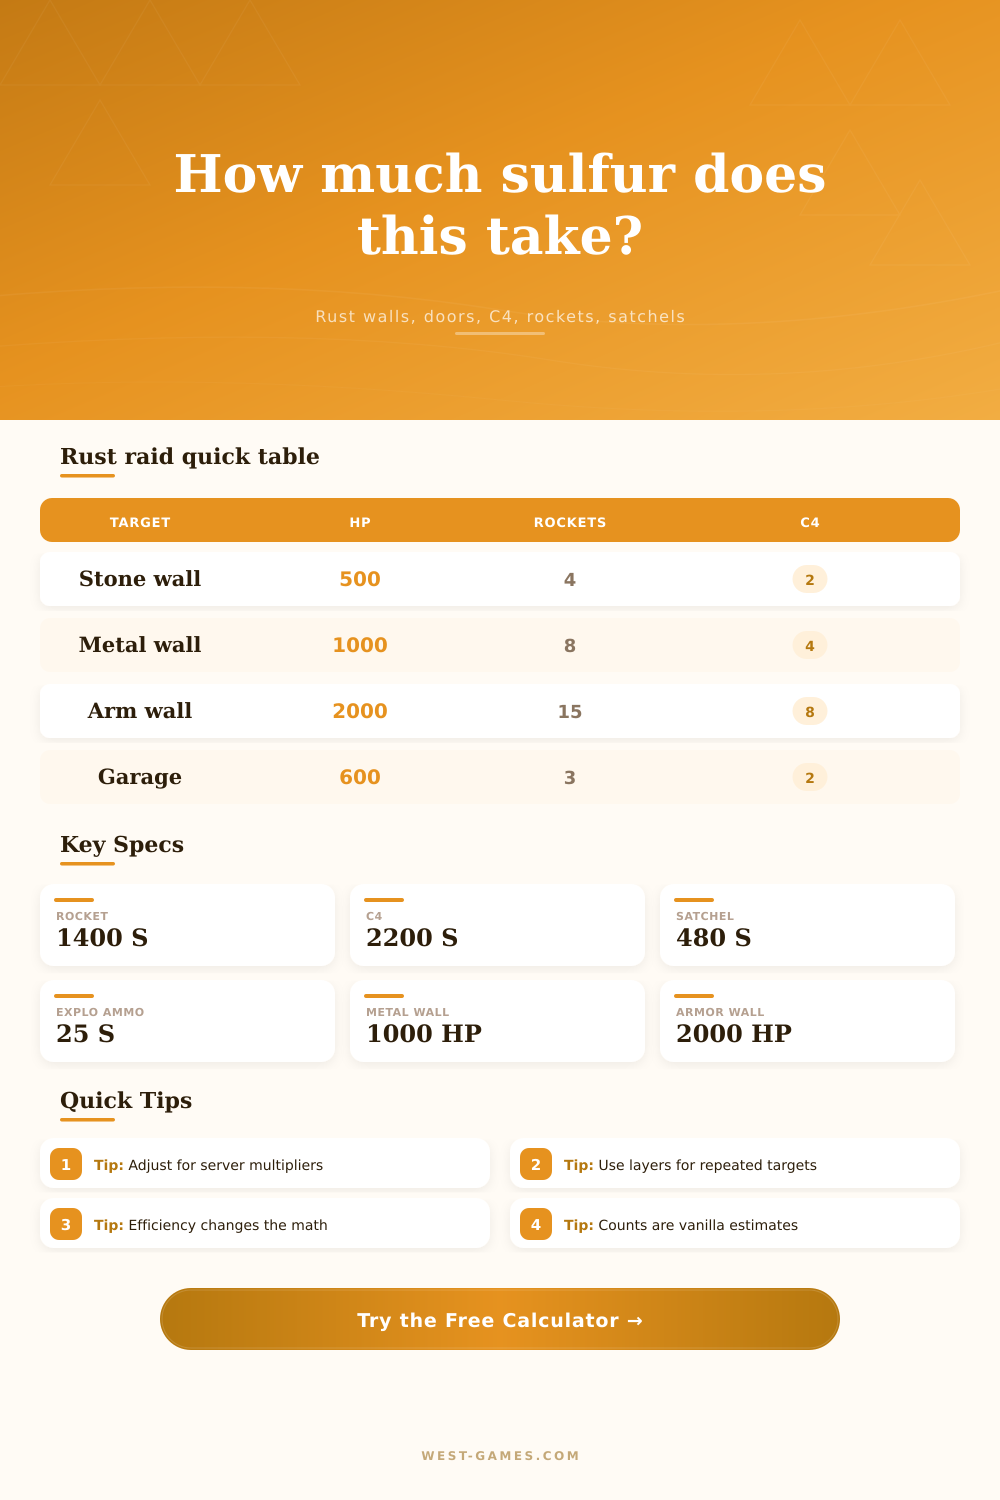
Total vanilla Rust structure HP, rockets, timed explosive charges, satchels, explosive 5.56 ammo, raw sulfur, explosive-item requirements, layer count, and splash efficiency in one neutral resource planner.
| Target | HP | Rockets | C4 | Satchels | Explosive ammo |
|---|---|---|---|---|---|
| Wood wall | 250 | 2 | 1 | 4 | 56 |
| Stone wall | 500 | 4 | 2 | 10 | 185 |
| Sheet metal wall | 1000 | 8 | 4 | 24 | 400 |
| Armored wall | 2000 | 15 | 8 | 46 | 799 |
| Wooden door | 200 | 1 | 1 | 2 | 28 |
| Sheet metal door | 250 | 2 | 1 | 4 | 63 |
| Garage door | 600 | 3 | 2 | 9 | 150 |
| Armored door | 1000 | 5 | 3 | 15 | 251 |
| Explosive type | Raw sulfur each | Explosives item each | Typical role in calculator | Rounding behavior |
|---|---|---|---|---|
| Rocket | 1,400 | 10 | Layer and splash comparison | Whole rockets only |
| Timed Explosive Charge / C4 | 2,200 | 20 | Direct single-target count | Whole charges only |
| Satchel Charge | 480 | 0 | Lower-tier explosive total | Whole satchels only |
| Explosive 5.56 Rifle Ammo | 25 | 0 | Ammo count and sulfur total | Whole rounds only |
| Preset | Target mix | Layers | Default method | What it tests |
|---|---|---|---|---|
| Stone Wall Layer | Stone wall | 1 | Lowest sulfur | Basic 500 HP comparison |
| Sheet Metal Wall | Metal wall | 1 | C4 | 1000 HP resource count |
| Armored Wall | Armored wall | 1 | C4 | High HP sulfur total |
| Garage Door Count | Garage door | 1 | Lowest sulfur | Door HP and ammo count |
| Mixed Layer Total | Custom | 3 | Rockets | Editable repeated layers |
It’s a walled-in compound. You’re standing outside it. Sulfur is an important resource for destroying things, and sulfur smells like…sulfur. That smell’s on the wind. The fortress looms over you. It looks like a place where you will work long hours if you do things the wrong way.
If you’re dreading the event. Or perhaps craving it, you’d be surprised how much simple arithmetic separates a successful raid from a complete wipe. People ignore numbers until it’s too late. They’ll spend weeks gathering metal because they guessed wrong about how much sulfur is needed to destroy single door. They are just hoping for the best.
How to Plan Your Raid with Math
You don’t have to live that way. Knowing real price of destruction isn’t aggression; it’s resource management. It’s a matter of knowing how many explosives you’re throwing away, along with your time and effort. This means risking your whole base economy in one move.
That’s where the calculator comes in. Instead of having to understand the tradeoffs between different kinds of explosives, it do it for you, letting you worry about strategy instead. It takes your hit points and turns them into a specific amount of resources needed.
Want to break through a wall? The calculator tell you exactly how much sulfur you’ll need. Sulfur is the great equalizer; no matter what kind of explosive ammo you have, everything boils down to this one raw material. Whether it’s explosive ammo, satchel charges, C4, or rockets, everything lead back to sulfur.
The calculator helps you see invisible cost here. Sure, C4 may seem like a cheaper per-charge option than rockets… But actualy it will take more sulfur to get that same charge as compared to rockets. By taking the total sulfur required for each type of explosive, the calculator show the trade-offs so that you can compare them side-by-side.
You might discover that while satchels are less efficient per charge, they’re more sulfur-efficient at small target sizes. This will save you hours of mining.
Finally there’s efficiency. It’s easy to forget that in real life, you’re never going to perfectly hit all pixels of a wall with each rocket. Wind carries your shots off course and splash damage makes its own unpredictible mess. To reflect this, the calculator features an efficiency slider.
So if the terrain blocks your angle, or you’re simply not much of a marksman, you’ll end up wasting some explosives. Just adjust the percentage to give yourself a realistic buffer, and turn a theoretical minimum into a practical inventory check. Without the adjustment, you may plan on precisely the right amount of rockets to take down the wall, only to find yourself running dry part-way through.
Now you have a half-broken barrier that’s just too expensive to fully destroy. A little percentage for error is an insurance policy against frustration.
The last factor is server multipliers. These is huge in determining the ultimate price of something. If you’re on a double xp server, doubling your crafting rate means making explosives will take half the time, while still costing the same amount of resources. But that opportunity cost changes things.
If you might be able to recoup the materials quickly, then maybe you’re comfortablely burning through some more sulfur for a raid? Server speed isn’t taken into account by the calculator, but it provides you with the base vanilla figures. And from there you can tweak the numbers in your head based on how your server is configured.
Do they have doubled loot drops? It makes the sulfur cost feel lower. It makes sulfur cheaper. Are they hardening structures? It makes it feel more expensive. Having standard baseline in mind helps you make those mental tweaks on the fly.
But the real meat-and-potatoes is stockpile management. One thing is knowing that you’re going to need eight C4 charges. Another is knowing that you’ve got six laying around. With this tool you can subtract out whatever’s sitting in your bag. And then it’ll show you how many you’re still lacking.
What changes here is that the question shifts from “what do I need?” to “what must I craft.” That makes all the difference when trying to time your raids. If you’re way behind you may hold off until you’ve collected up some goods. If you’re not far off at all then you know you can go now.
It’s a simple subtraction and can save you from that “oh crap we don’t have enough stuff” panic when the target comes into view. A raid is about precision, but also about patience. You can’t look at the short term, you should of think of the long term resource effects when planning out a raid.
The numbers on the screen are nothing more than data. The true worth comes from knowing how those numbers affect your ability to survive. Whether you’re attacking high tier compound or a tiny shack, the principles is the same.
You add up the cost. You factor in error. You double-check your inventory before pulling the trigger. If you aren’t prepared, then the compound will still be standing tomorrow. Your resources, however, may not be.
Rushing isn’t worth the risk. Take the time to do the math. Take the time to get the math right, and the breach will be the easy part. You always know what the cost is beforehand. That’s why you’re willing to pay it.