✨ Genshin Elemental Mastery Calculator
Compare Elemental Mastery for Vaporize, Melt, transformative reactions, Aggravate, Spread, reaction bonus effects, level multiplier, enemy resistance, and practical EM buff value.
| Setup | Total EM | EM bonus | Estimated output | Relative gain |
|---|
The added EM row uses the same reaction type, reaction bonus, level multiplier, and enemy context as the current row.
| Reaction | Category | Base multiplier | EM formula used | Damage context |
|---|---|---|---|---|
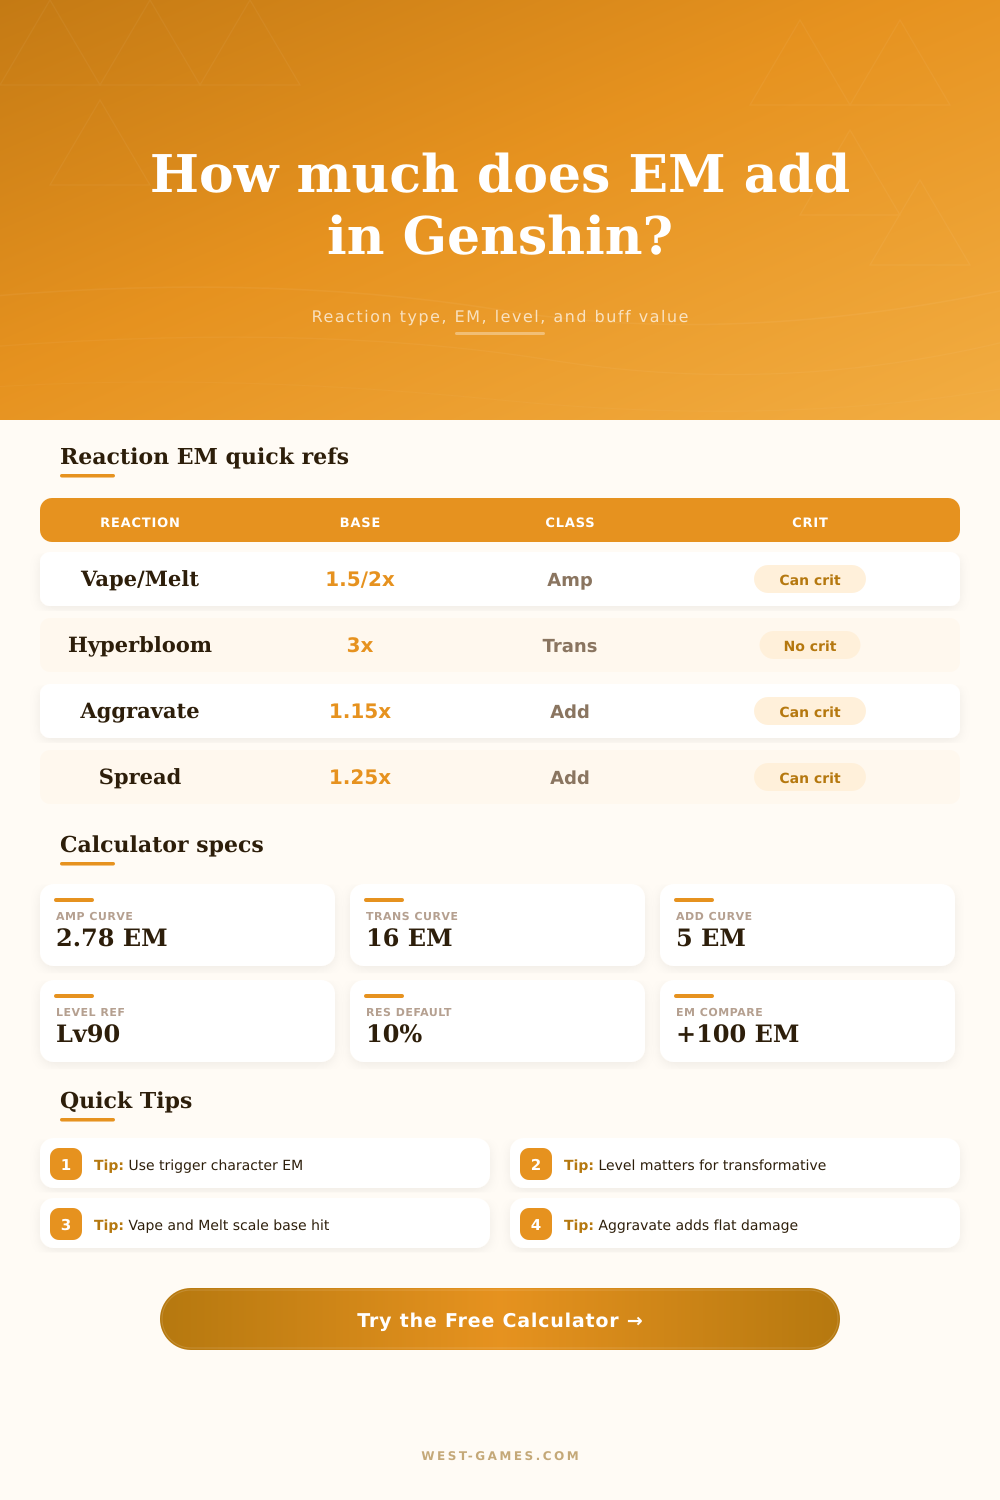
| Hydro Vaporize / Pyro Melt | Amplifying | 2x | 2.78 x EM / (1400 + EM) | Multiplies the triggering attack and can crit. |
| Pyro Vaporize / Cryo Melt | Amplifying | 1.5x | 2.78 x EM / (1400 + EM) | Common reverse reaction setup for frequent triggers. |
| Bloom | Transformative | 2x | 16 x EM / (2000 + EM) | Scales with trigger EM, level, reaction bonus, and Dendro resistance. |
| Hyperbloom / Burgeon | Transformative | 3x | 16 x EM / (2000 + EM) | Large level-scaling reaction that normally cannot crit. |
| Overloaded | Transformative | 2.75x | 16 x EM / (2000 + EM) | Pyro reaction damage after resistance. |
| Swirl | Transformative | 0.6x | 16 x EM / (2000 + EM) | Uses the Anemo trigger's EM and level for Swirl damage. |
| Aggravate | Additive | 1.15x | 5 x EM / (1200 + EM) | Adds flat Electro damage before downstream damage multipliers. |
| Spread | Additive | 1.25x | 5 x EM / (1200 + EM) | Adds flat Dendro damage before downstream damage multipliers. |
Transformative reactions do not use the base hit field; Vaporize and Melt do. Aggravate and Spread show both flat additive bonus and a final-context estimate.
| EM | Vape / Melt EM bonus | Transformative EM bonus | Aggravate / Spread EM bonus | Planning note |
|---|---|---|---|---|
| 0 | 0.0% | 0.0% | 0.0% | No EM contribution; reaction bonus may still apply. |
| 100 | 18.5% | 76.2% | 38.5% | Small EM buffs are most visible from low starting EM. |
| 300 | 49.1% | 208.7% | 100.0% | Common early reaction-build target area. |
| 600 | 83.4% | 369.2% | 166.7% | Transformative reactions still gain strongly with level 90. |
| 900 | 108.8% | 496.6% | 214.3% | Buff comparisons matter because curves have diminishing returns. |
| 1200 | 128.3% | 600.0% | 250.0% | High EM builds should compare reaction bonus and resistance shred too. |
These percentages are the EM portion only. Add reaction bonus percent separately, then apply the reaction's base multiplier.
| Level | Multiplier | Level 90 share | Used for | Context |
|---|---|---|---|---|
| 20 | 80.58 | 5.6% | Transformative / Additive | Low-level reaction tests are not representative. |
| 40 | 207.38 | 14.3% | Transformative / Additive | Level matters more than small EM swaps here. |
| 50 | 323.60 | 22.4% | Transformative / Additive | Still far below level 90 reaction output. |
| 60 | 539.10 | 37.3% | Transformative / Additive | Reaction drivers start to become usable. |
| 70 | 765.64 | 52.9% | Transformative / Additive | Noticeably better but not close to full reaction value. |
| 80 | 1077.44 | 74.5% | Transformative / Additive | Level 80 to 90 is a large reaction-damage jump. |
| 90 | 1446.85 | 100% | Transformative / Additive | Standard level for Hyperbloom, Burgeon, Bloom, and Swirl drivers. |
Vaporize and Melt do not directly use this level multiplier; their damage comes from the triggering attack's normal damage calculation.
| Category | Calculator output | Crit and DMG bonus | Resistance handling | Buff comparison focus |
|---|---|---|---|---|
| Amplifying | Base hit x reaction multiplier x EM and reaction bonus factor | Can crit because the attack itself crits | Already inside the base hit if entered after enemy context | Compare EM against CRIT, ATK, HP, DEF, and DMG bonus. |
| Transformative | Reaction multiplier x level multiplier x EM factor x resistance | Normally no crit and no talent scaling | Applied to the reaction element when enabled | Compare EM, character level, reaction bonus, and resistance shred. |
| Additive | Flat Aggravate or Spread bonus plus final-context estimate | Can crit after being added into the normal hit formula | Applied in the downstream final-context estimate | Compare EM against CRIT, DMG bonus, talent scaling, and enemy defense. |
| Crystallize | Not modeled as damage here | No damage hit to crit | Shield absorption context instead | Use a shield calculator rather than this damage-focused tool. |
A lot of people stack Elemental Mastery or just forget about it without knowing what it actualy does. On your artifact screen it look like nothing until something happens, usually a reaction, and it turns into some hard-to-parse numbers that represent damage. Here’s the problem: Elemental Mastery doesn’t scale linearly, like critical damage or attack do. It has diminishing-returns curves that make each additional point of Elemental Mastery worth less and less the more you get. Adding 100 points of Elemental Mastery to someone who have no Elemental Mastery is different then adding 100 points of Elemental Mastery to someone with 500. Most teams underperform because they don’t understand this, they’re spending resources on a stat that becomes less valuable per-point every time they spend another point. And worse, they may not even know when they’ve reached diminishing returns.
Most guides miss this: The calculator separates reactions into their mechanical categories, which include amplifying, transformative, and additive types. Amplifications (Melt & Vaporize) multiplies the damage of the hit they’re triggered by. That means Elemental Mastery competes head-to-head with your character’s bonuses to damage, crits, etc. For example, if you’re building Hu Tao around her vaporize, each point of Elemental Mastery has to earn its keep versus a point of crit damage. The calculator breaks reactions down into these mechanics so you can see that tradeoff more easily. You can plug in your base hit damage to see how much your reaction bonus scales relative to your crit multipliers.
Why You Should Not Stack Too Much Elemental Mastery
Reactions such as Burgeon and Hyperbloom is transformative in this sense. They do not rely on specific weapon or character stats. Instead, they use both a base damage number and a level multiplier. This essentially makes your character’s actual level more important than its artifact or main weapon stats, unless those stats factor into Elemental Mastery. In other words, a level ninety Nahida with no attack can still deal more Bloom damage than a level eighty Nahida with double the attack.
Between those two extremes are Additive reactions such as Spread and Aggravate. Additive reactions applies flat damage to the hit, and then multiply that damage by your standard damage buffs. That makes them sort of a hybrid: you still want to have decent critical stats, but your Elemental Mastery contribution is unrelated to your attack percentage. The page has some reference tables that explain all of this clearly, so you can get an exact idea of which curve each reaction follows.
As much as you need to read what’s being put out there, you also should of understand the input fields. For example, I frequently see people accidentally set enemy resistance to 0, which matters a lot when fighting elite bosses and in Spiral Abyss. Using Shredders like Sucrose to reduce resistance will greatly boost the value of all those Elemental Mastery points, since resistance multiplies final reaction damage. If you don’t account for it, your damage estimate will be overly optimistic and come up short in reality.
Lastly, keep in mind where that Elemental Mastery comes from. While artifact substats give you a solid base, elemental skill buffs from your teammates (e.g., Sucrose, Nahida) comes and go. That’s why the calculator displays your current total Elemental Mastery without any buffs and with them applied. This shows how much of a boost you are getting from those buffs. That will help you determine if you want to stick with the team chemistry or switch up artifacts. For example, maybe a teammate’s massive buff grants you a huge amount of Elemental Mastery compared to everyone else, so you don’t necessarily have to put as much into it.
No one has the perfect amount of Elemental Mastery. It depends on what kind of reactions you use, your character’s level, and how many other damage multipliers you have. That’s what this tool eliminates… The guess work from that formula. Rather than running after some abstract elemental mastery requirement of 500, you can figure out the precise threshold at which extra E.M. Isn’t worth it anymore compared to getting a single additional crit rate point or a reaction damage bonus point. This is the sweet spot; here you stop throwing away resources.
But what does building for reactions mean? It’s efficient. It is not because of the number you get out of it, but because of understanding how the curve functions and how reactions stack into the end result. That means you no longer treat Elemental Mastery like a magical fix-all. Instead, it becomes one part of a complex equation that must be balanced. And when you look down at your artifact set the next go around, you don’t just see a spread of stats, you see a sequence of trade offs that define what kind of damage you can put out.