KSP Thrust to Weight Calculator
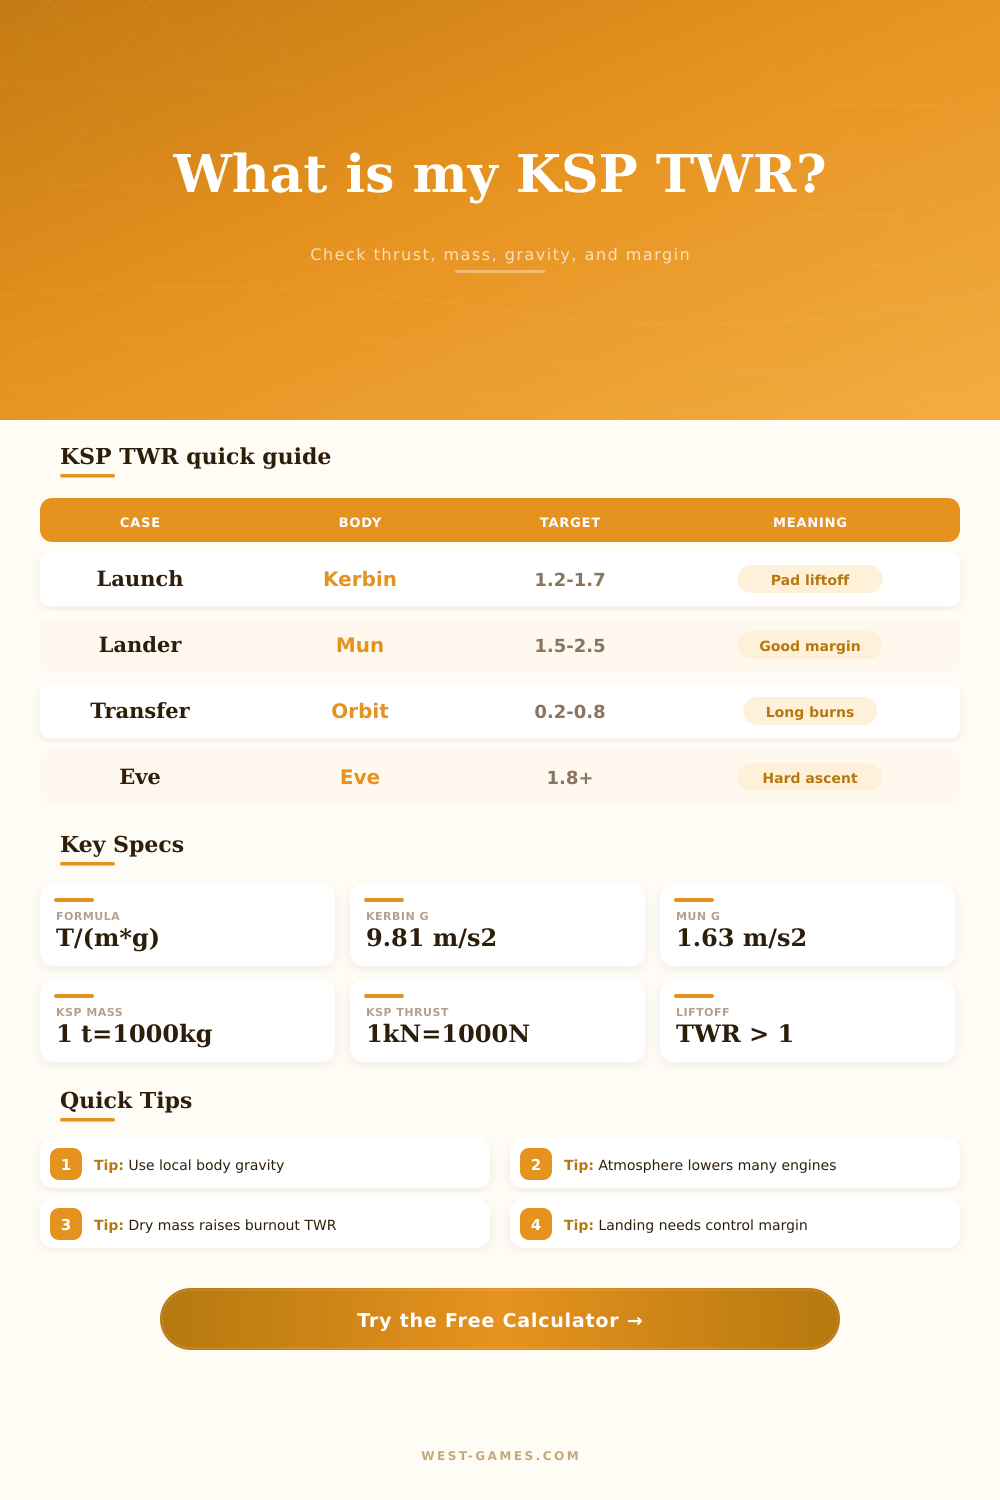
Calculate Kerbal Space Program thrust-to-weight ratio from craft mass, active engines, throttle, local body gravity, and atmosphere pressure, then compare liftoff, landing, and burnout margins.
Calculation breakdown
| Body | Surface gravity | m/s² | Pressure at datum | TWR note |
|---|---|---|---|---|
| Kerbin | 1.000 g | 9.81 | 1.000 atm | Launch TWR above 1 lifts; 1.2 to 1.7 is a common first-stage band. |
| Mun | 0.166 g | 1.63 | 0 atm | Vacuum landers usually feel comfortable around 1.5 to 2.5 local TWR. |
| Minmus | 0.050 g | 0.49 | 0 atm | Very low gravity; tiny engines can have high local TWR. |
| Duna | 0.300 g | 2.94 | 0.066 atm | Thin atmosphere; engines are near vacuum performance but landing needs margin. |
| Eve | 1.700 g | 16.68 | 5.000 atm | High gravity and dense air make ascent TWR and engine choice demanding. |
| Laythe | 0.800 g | 7.85 | 0.600 atm | Atmosphere helps recovery but reduces many rocket engines below vacuum thrust. |
| Tylo | 0.800 g | 7.85 | 0 atm | No atmosphere and high gravity; landing TWR margin matters a lot. |
| Moho | 0.275 g | 2.70 | 0 atm | Vacuum body; transfer delta-v is hard, but local TWR is moderate. |
| Ike | 0.112 g | 1.10 | 0 atm | Lower gravity than Mun; small landers can hover easily. |
| Eeloo | 0.172 g | 1.69 | 0 atm | Vacuum outer body with Mun-like landing TWR needs. |
| Engine | Vac thrust | 1 atm thrust | Isp vac / sea | Best TWR use |
|---|---|---|---|---|
| LV-T30 Reliant | 240 kN | 205.16 kN | 310 s / 265 s | Early booster and simple Kerbin launch stages. |
| LV-T45 Swivel | 215 kN | 167.97 kN | 320 s / 250 s | Starter launch stages that need thrust vector control. |
| LV-909 Terrier | 60 kN | 14.78 kN | 345 s / 85 s | Vacuum upper stages, Mun landers, and Minmus landers. |
| 48-7S Spark | 20 kN | 16.27 kN | 320 s / 270 s | Small probes and light landers. |
| RE-L10 Poodle | 250 kN | 64.29 kN | 350 s / 90 s | Medium vacuum stages and heavier landers. |
| RE-I5 Skipper | 650 kN | 568.75 kN | 320 s / 280 s | Medium launchers and upper boosters. |
| RE-M3 Mainsail | 1500 kN | 1379.03 kN | 310 s / 285 s | Heavy Kerbin boosters and large core stages. |
| KS-25 Vector | 1000 kN | 936.51 kN | 315 s / 295 s | High-pressure ascent, Eve ascent, and compact thrust stacks. |
| LV-N Nerv | 60 kN | 13.88 kN | 800 s / 185 s | Efficient vacuum transfer stages with low TWR tolerance. |
| IX-6315 Dawn | 2 kN | 0 kN | 4200 s / 100 s | Ion probes and very long vacuum burns. |
| Local TWR | Launch meaning | Landing meaning | Transfer meaning | Practical check |
|---|---|---|---|---|
| Below 1.00 | No vertical liftoff from that body. | Cannot hover; descent must be arrested by other means. | Still works in orbit, but burns may be long. | Use for ions, Nerv tugs, and patient vacuum burns. |
| 1.00 to 1.20 | Marginal ascent; gravity losses can be high. | Very tight landing control and slow climb-out. | Fine for most orbital maneuvers. | Add engines, reduce mass, or wait for lower gravity. |
| 1.20 to 1.70 | Common Kerbin first-stage target range. | Gentle but useful hover and touchdown margin. | Usually more than enough for transfers. | Good starting point for early rockets. |
| 1.70 to 2.50 | Strong ascent; watch drag and control. | Comfortable Mun, Duna, and Tylo landing band. | Shorter burns, but more engine mass. | Useful when timing or landing terrain is unforgiving. |
| Above 2.50 | Very punchy; may waste delta-v in thick air. | Responsive hover, but throttle can be touchy. | Fast burns at the cost of mass efficiency. | Throttle limit, remove engines, or stage earlier. |
| Item | Formula | Example | Result | Why it matters |
|---|---|---|---|---|
| Vehicle TWR | thrust / (mass x g) | 205 kN / (14.6 t x 9.81) | 1.43 | Core ratio for liftoff, hover, and acceleration checks. |
| KSP shortcut | kN / (t x m/s²) | 1000 N and 1000 kg cancel | same TWR | KSP units make the equation convenient. |
| Weight force | mass x gravity | 14.6 t x 9.81 | 143.2 kN | Thrust must exceed this for vertical liftoff. |
| Net acceleration | thrust / mass - g | 205 kN / 14.6 t - 9.81 | 4.24 m/s² | Shows how quickly the craft gains vertical speed. |
| Burnout TWR | thrust / (dry mass x g) | 205 kN / (6.1 t x 9.81) | 3.43 | TWR increases as fuel mass drops. |
| Engines needed | ceil(target weight / thrust each) | 1.35 x weight / 205 | 1 engine | Quickly sizes engine count for a target TWR. |
There’s that exact point in Kerbal Space Program where you’ve got a rocket on the launchpad, the engines are screaming, but it won’t budge. It’s not a bug. It’s physics. One number make the difference between liftoff and explosion. That number is your thrust-to-weight ratio.
If your craft exceed 1 TWR, you’ll fly. If not, you’re stuck. Put your engine specs and mass into the calculator and it does all the math for you. You won’t have to pull up part cards or struggle to do the math in your head while under pressure, it saves you time.
Why Thrust-to-Weight Ratio Matters in KSP
It’s a simple idea, but one that seems to elude many. Weight is force of gravity pulling you down. Upward thrust pushes you up. There is more thrust than weight. You’re flying! Less thrust then weight? Well…crash. How much margin do you have? That’s shown by the ratio.
1.0? Hovering only. Can’t accelerate upwards. Below 1.0? Nope. There’s no escaping it. Many people overlook this. They seek an exact ratio of 1.0, never realizing that hovering burns fuel. As fuel is lost, you lose mass, which raise the ratio slightly. But by then, you have used a lot of propellant to fight gravity.
In-game, kerbin has a gravity force of 9.81 meters per second squared which is considered normal gravity. So when you go to launch from eve, it feels like something else. It’s 1.7 times more gravity and you have an atmosphere that will cut into the power of engines. That rocket that flies off the pad at kerbin might not even get airborne on eve. Engines such as the Nerv and Terrier loses significant thrust when in heavy air.
Because of this, we let you compensate for atmospheric pressure. The calculator accounts for this, so what you calculate should match what actualy happens (not some theoretical vacuum).
As fuel is burned off, your craft will become lighter. That’s a dynamic process. Your thrust-to-weight ratio at liftoff isn’t going to be the same as your ratio when you’re burning out. You may start with a ratio of 1.2 that makes it hard to climb. At the end you could have a ratio of 3.0 (or even higher) with the same engines pushing the craft along. That late-surge can also prove dangerous if you don’t have your staging correct, causing your craft to structurally fail.
It is a small point but it matters a lot. Build to the worst case: liftoff.
And then there’s landing. Orbital insertion doesn’t require big thrust. Landing requires a different mindset. You don’t need high thrust, but you do need control. But what it requires is control.
To land on the Mun, a craft must have enough thrust to overcome low gravity, while not having so much that it cannot hover. Here’s where dialing in your throttle gets interesting. According to the reference data, the usual thrust-to-weight band for landing provides a comfortable margin for adjustment, between 1.5 and 2.5. This gives you enough time to fine tune your trajectory, avoiding a slam dunk onto the ground.
That is where the balancing act is. Not enough thrust, and you can’t stop yourself. Too much, and you won’t be able to steer.
Another part of the story involves transfer stages. On long burns with ample delta-v, you can have a thrust-to-weight ratio far less than 1.0. This works because in the vacuum of space, gravity isn’t your instant adversary. Nuclear tugs and ion engines works here. They are slow and super-efficient. The calculator illustrates this tradeoff for you. It shows you how many engines you’d need to get to a higher target.
More often than not? You don’t even need more engines. Just be prepared to wait a little longer.
The true art is in planning. A lot of people think it’s all about building rockets. No. It’s also about understanding what each part of the system can do and cannot do. Kerbin wants to be punched. Eve wants power and efficiency. The Mun requires precision. Running those numbers beforehand saves so much time in-game because you’re not doing that stupid trial-and-error loop which takes up hours.
Don’t go into the Vehicle Assembly Building thinking “Oh let’s see if this will work”. That isn’t the point of the game. Go there with confidence, knowing what your ship will do when pushed to its limits. Sometimes the rocket sitting silently on the pad is the rocket that’s already been run through the numbers.